Friday, July 6, 2012

Cookie Butter Cookies

I know.

I know, I know, I know.

But hear me out for a second. Making cookies out of cookie butter isn't going backwards. It's completing a circle. We can get all into Lion King songs right now. That's good, right?

Okay, I'm losing you again. Maybe I should first explain what cookie butter is for those of you who may not know. Cookie butter is a spread made up mostly of Speculoos cookies which are traditionally eaten on Sinterklaas, St. Nicholas's feast in the Netherlands, Belgium and northern France. (Yes, I did a bit of research.) History aside, the butter has the consistency of thick peanut butter and tastes like cinnamon, nutmeg and all things wonderful about late Fall and Christmas baking. (Psst: Check out all my sandwich spreads!)

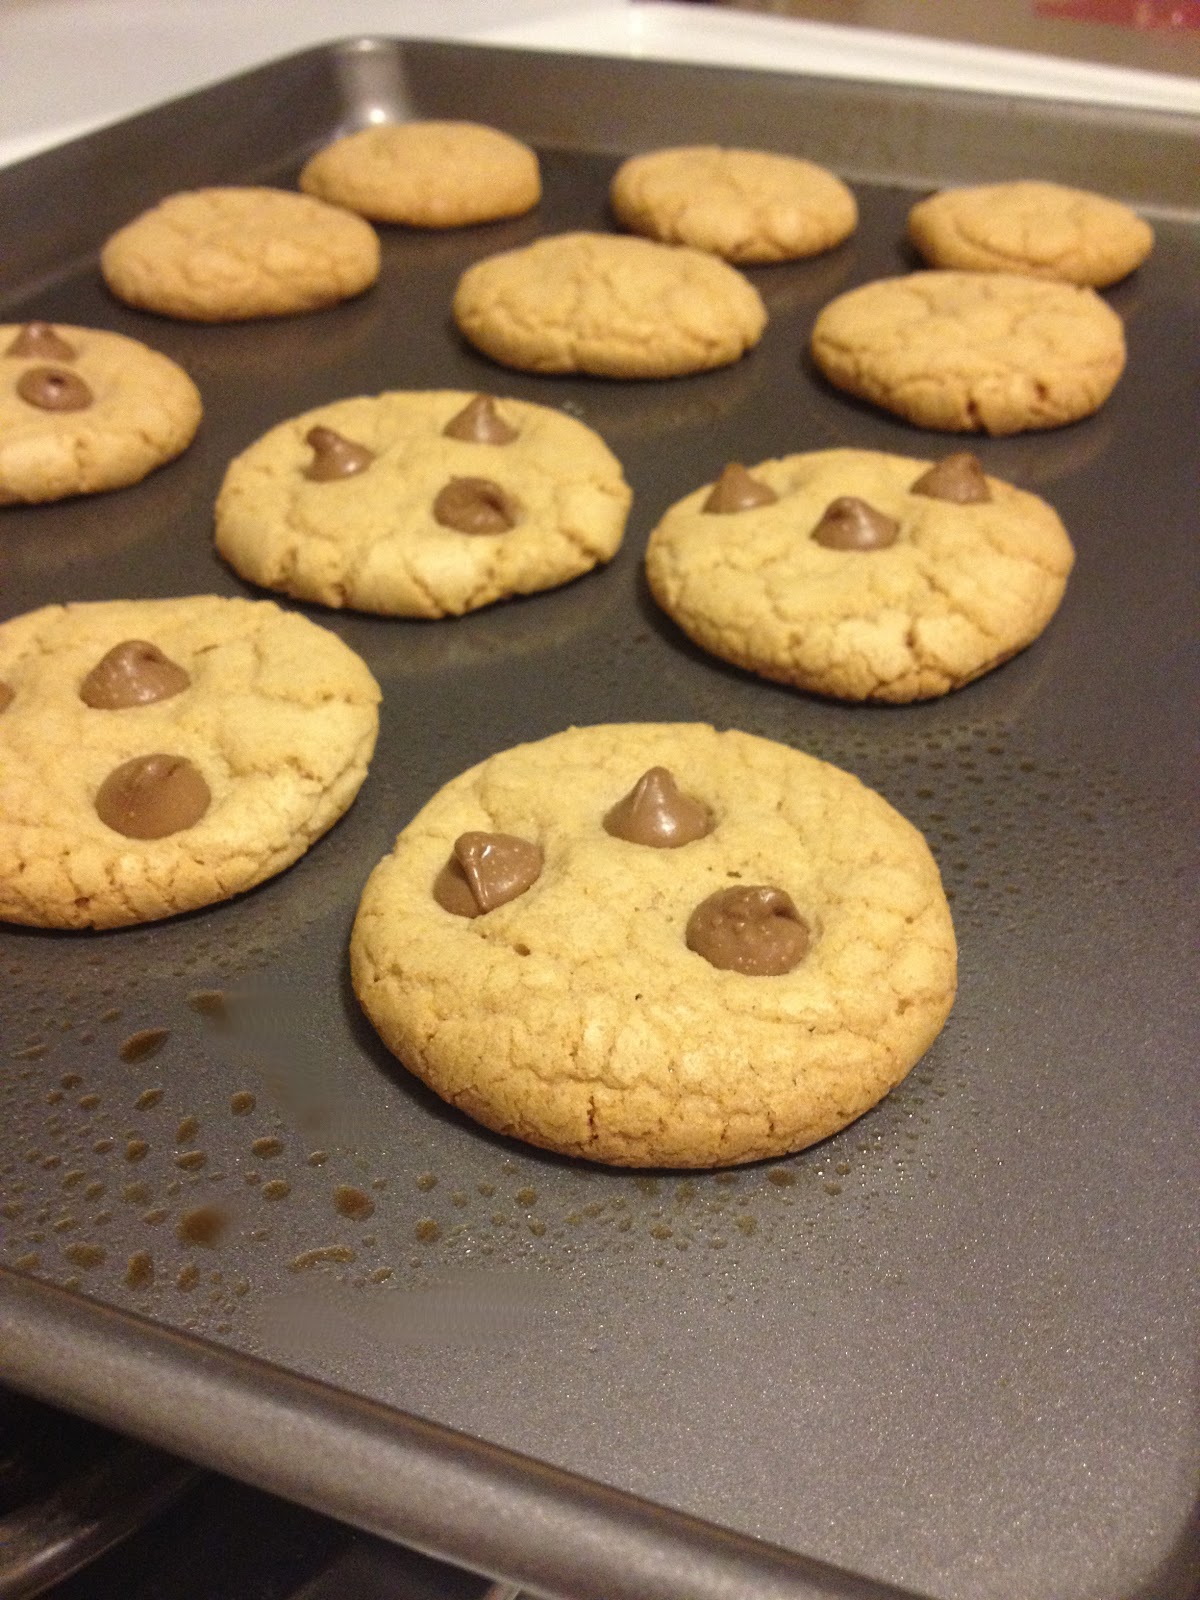
I could probably eat it by the spoonful, but it is also good on toast, with chocolate and with apples I'm hoping because that will likely be my breakfast tomorrow. To see if it bakes like peanut butter, I incorporated it into some cookies and it really does a lovely job. The warm spices spread throughout the cookies, which can be good on their own, made into sandwich cookies or crumbled over ice cream. Be creative with the cookies or with the butter itself. Just don't be surprised when you find yourself in line at Trader Joe's the next day with half a dozen jars in hand.

Cookie Butter Cookies
Makes 1 1/2 dozen.

1/4 cup butter, softened
1/4 cup cookie butter
1/2 cup sugar
1/2 cup brown sugar
1 egg
1 teaspoon vanilla
1 cup flour
1 teaspoon baking powder
1/2 teaspoon baking soda
1/2 teaspoon salt
1/4 cup chocolate chips, if desired

Preheat oven to 350 degrees and prepare baking sheet.
Blend butter, cookie butter, sugar and brown sugar until light and fluffy, about three minutes. Add egg and mix thoroughly. Add vanilla. In separate bowl whisk together flower, baking powder, baking soda and salt. Add dry ingredients to wet and mix until just combined. Mix in chocolate chips by hand if desired.
Roll into walnut sized balls and place on baking sheet about two inches apart. Bake for 18-20 minutes or until lightly golden brown. Remove to cool on a cooling rack.


Saturday, June 30, 2012

Candy-coated Chocolate-covered Sunflower Seed + Oatmeal Cookies

One thing I enjoy probably as much as baking is traveling. In the last year and a half I've made my way through a decent number of East coast citiesPhiladelphia, New York and Boston to name a fewand am often planning out my next adventures: the West coast, the South, Italy, France, England.... Even a small trip to Chicago accelerates my pulse, which is where the inspiration and possibility of these cookies enter.


A few suburbs out of the city, I stayed with a friend, C. She and I have been friends for years, having gone to grade school together. After a truly delicious breakfast at Egg'lectic Cafe (get the blueberry granola pancakes with raspberry sauce; the sauce is essential and oh so good), we did some shopping at Target and Trader Joe's. It was my first Trader Joe's outing and I was internally going through posts from other bloggers about their favorite things to purchase. Right as I was turning to leave, my eye caught a brightly colored plastic container. Candy coated chocolate covered sunflower seeds. They had to be mine.


While perfectly delicious on their own, I wanted to throw these happy seeds into a baking project. Cookies seemed the most logical choice, so I got to work combining the totally healthy seeds with totally healthy oatmeal. These guys are a healthy breakfast snack, basically.

These cookies are slightly chewy and studded with pastel colored seeds for a little hidden surprise. I found myself eating three in under two minutes, so make sure to share these with friends. Or get ready to eat breakfast all day long. There's no shame in that.


Candy Coated Chocolate Covered Sunflower Seed + Oatmeal Cookies
Makes 1 1/2 dozen.

6 tablespoons butter, softened
1/2 cup sugar
1/2 cup brown sugar
1 egg
1 teaspoon vanilla
1 cup flour
1 cup oats
1 teaspoon baking powder
1/2 teaspoon baking soda
1/2 teaspoon salt
1 teaspoon cinnamon
1/4 cup candy coated chocolate covered sunflower seeds

Preheat oven to 350 degrees and line baking pan.
Blend butter and sugars until light and fluffy, about three minutes. Add egg an vanilla and mix until incorporated. In separate bowl whisk together flour, oats, baking powder, baking soda, salt and cinnamon. Slowly incorporate dry ingredients into wet batter. Stir in sunflower seeds.
Roll out walnut sized balls of dough and place onto baking sheet about 2 inches apart. Bake for 18-20 minutes or until lightly browned. Let cookies cool on cooling rack.


Tuesday, June 5, 2012

Brown Sugar Biscuits


Failed baking test trials can really mess with your groove. Even if they aren't complete disasters, it can be frustrating for something not to turn out quite as you imagine it will. Especially if it leads to a general lack of inspiration. That's where these biscuits come in.


I know what you're thinking. Inspirational biscuits? Is that even possible?
Yes, absolutely. When you wake up with a hungry stomach loudly making known its need for immediate sustenance, biscuits are the most inspirational thing in the world.


Luckily, these biscuits come together crazy quick and are open to so many add-ins. Bacon pieces, like the original recipe? Slivered almonds, dark chocolate and coconut for an almond joy variation? Raspberries and white chocolate chunks? Chives and cheddar for a savory route? Either way, you'll end up with flaky, buttery, crumbly, melt-on-your-tongue, lightly sweet heaven.


Brown Sugar Biscuits
Adapted from Joy the Baker

3 cups flour
2 tablespoons brown sugar
2 tablespoons granulated sugar
3 teaspoons baking powder
1 teaspoon baking soda
3/4 teaspoon salt
1/2 teaspoon cracked pepper
1 large egg
3/4 cup buttermilk
3/4 cup butter, cut into pieces

Preheat oven to 350 degrees. Prepare baking sheet by lining with foil or parchment paper.

Whisk together flour, sugars, baking powder, baking soda, salt and pepper. Cut butter into flour mixture, mixing until crumbly.
In separate bowl, whisk buttermilk and egg together. Add to dry mixture and mix until just combined.
Turn out on floured surface, kneading a few times if necessary. Roll out to 1 inch thickness and cut with 2 inch biscuit cutter. Bake 12-15 minutes until golden brown.


These are great on their own, but would also be wonderful with butter, honey, jam or a fried egg and bacon for a breakfast sandwich.

Share them with friends. Otherwise you'll find yourself four biscuits gone and crumbs all over your shirt. Not that this happened to me or anything.


Tuesday, May 29, 2012

Neapolitan Birthday Cake

For my first birthday away from home (I recently finished my second year of college) I decided to take matters into my own hands where my birthday cake was concerned. If I didn't make it, who would? I spent a few weeks shuffling through my bookmarked recipesof which I may have too manyand finally asked, "Why do I have to choose one flavor of cake? Why can't I have...three?" Enter Neapolitan, stage left.


My kitchen routinely looks like this, except with three (or four or five) times the mess, while I'm baking. I am not a neat baker: flour is dusted across the counters, possibly in puffy pockets on the floor, possibly under my nails, possibly in my hair...no big deal.

This cake on the other hand...definitely a big deal.


Check out that pink! Strawberry Jell-O and strawberry puree make this batter bright pink and out-of-this-world delicious. I likely could have eaten the batter straight without letting it anywhere near the oven. 


By the way, this cake has six layers. Two strawberry, two chocolate, two vanilla. Did I not mention that? Yeah... It looks like a beast of a cake, but it isn't. Well, it is. But it bakes up quicker than you think and is gorgeous when cut into. Totally worth the work.

Some advice? Clean as you go. Mix, bake, do some dishes, get that flour out of your hair, repeat. Then your kitchen's clean and you can relax with a big slice of "Welcome to your 20s."


Six-Layer Neapolitan Birthday Cake with Pink Frosting

For Strawberry Cake:

2 cups granulated sugar
1 3oz package strawberry Jell-O
1 cup butter, softened
4 eggs, room temperature
2 3/4 cups all-purpose flour
2 1/2 teaspoons baking powder
1 cup whole milk, room temperature
1 tablespoon vanilla extract
1/2 cup strawberry puree (blend frozen strawberries with 1 tablespoon sugar)

Preheat oven to 350 degrees. Prepare two 8" pans with butter (or spray) and flour.

Whisk flour and baking powder together in medium bowl.
In large bowl cream butter, sugar and strawberry Jell-O powder until light and fluffy. Add eggs one at a time, mixing well. Alternate additions of dry ingredients with additions of milk and vanilla, beginning and ending with dry ingredients. Blend in strawberry puree.

Pour batter into prepared pans. Bake for 25 minutes or until knife inserted into center comes out clean. Allow to cool in pans for 20 minutes before removing onto wire rack to continue cooling.


For Vanilla Cake:
Adapted from Sweetapolita

1/3 cup butter
1 1/3 cups granulated sugar
2 1/3 cups all-purpose flour
2/3 teaspoon salt
2 teaspoons baking powder
1 cup ice water
1 teaspoon vanilla
3 egg whites

Preheat oven to 350 degrees. Prepare two 8" pans with butter (or spray) and flour.

Beat egg whites until stiff peaks form. Set aside.
In separate medium bowl whisk together dry ingredients.
In large bowl cream butter and sugar until light and fluffy. Alternate additions of dry ingredients with additions of ice water and vanilla, beginning and ending with dry ingredients. Fold in egg whites with spoon or rubber spatula.

Pour batter into prepared pans. Bake for 30 minutes or until knife inserted into center comes out clean. Allow to cool in pans for 15 minutes before removing onto wire rack to continue cooling.

For Chocolate Cake:

2 1/4 cups all-purpose flour
2 cups granulated sugar
1 cup unsweetened cocoa powder
2 teaspoons baking soda
1/2 teaspoon salt
1 tablespoon vanilla extract
2/3 cup oil
2 teaspoons white vinegar
2 cups cold water

Preheat oven to 350 degrees. Prepare two 8" pans with butter (or spray) and flour.

In medium bowl whisk together flour, sugar, cocoa powder, baking soda and salt.
In large bowl blend vanilla, oil, vinegar and water. Slowly add dry ingredients to wet, mixing until just combined. Batter will be thin.

Pour batter into prepared pans. Bake 25 minutes or until knife inserted into center comes out clean. Allow to cool in pans for 20 minutes before removing onto wire rack to continue cooling.

For Frosting:

1 1/4 cup butter, softened
8 cups powdered sugar
120 ml whipping cream
2 tablespoons vanilla extract
1 tablespoon water
pinch salt
1/4 teaspoon rose icing color (I used Wilton)

In stand mixer blend butter and powdered sugar until fully incorporated. Add vanilla, water, whipping cream and salt until smooth. Add color until fully blended. If necessary, add more water, 1 teaspoon at a time, to adjust consistency. Makes enough to frost a monstrous 6 layer 8" cake.

For Assembly:

Assemble on cake stand or other flat surface (eg. cookie sheet) covered in sheet of aluminum foil for easy clean up later. Stack layers in alternating flavors for best aesthetic appeal. Between layers, frost with frosting or spread extra strawberry puree. I figured the cake would be sweet enough without extra frosting, so I simply stacked cake upon cake. This is a personal preference which I think worked very well for myself. Wrap or cover cake well and refrigerate 1 hour.
When frosting, begin at bottoms of sides and work way up. When finished frosting, rinse and lightly dry frosting spatula and sweep over sides and top of cake. This will create a smooth and neat finish.

Tips + Tricks:

Bake layers of cake a day or days ahead. Simply bake, wrap well in plastic wrap and aluminum foil and freeze. Take out to defrost a couple hours before assembly.

If you don't have a cooling rack (I don't always have access to one), do NOT remove warm cake from pan onto a plate or other surface, as it will stick. Instead remove to a piece of plastic wrap which will not stick. This will also help when later assembling cake.

I wanted to leave the cake simple to allow the striking flavors and colors to be the focal point of the cake. However, feel free to further decorate cake with sprinkles, icing borders, candles, the works. It's your birthday: go wild. :)


Wednesday, May 16, 2012

Lemon Tart


My boyfriend C eats lemons whole. I'm not sure about the seeds (I neglected to ask), but everything else definitely. When finished drinking his tea at a restaurant or squeezing some juice over chicken as a finishing touch, he'll just pop the lemon wedge straight into his mouth. Apparently it's something he inherited from his mother. Who am I to argue with tradition?


To address his love of lemons in a way that wouldn't result in my staring at him in disbelief for minutes after, I found this tart and first made it for his birthday. Since then he has requested it no less than a dozen times. In less than half a dozen months. Obviously a winning situation for everyone involved. ;)
This tart is no joke. This tart is tart. Trust me. The buttery and light crust nicely balances the lip-puckering action the filling induces. Take this tart out for company. Watch them lick the plate clean and then ask for more. Just make sure you have something to drink beside it to wash down the lemony tang. You'll feel like you're eating a lemon whole.

Lemon Tart

Sugar Cookie Crust:
1/3 cup sugar
½ cup butter, room temperature
1 ¼ cups all-purpose flour
¼ teaspoon salt
2 tablespoons cream
1 teaspoon vanilla extract

Lemon Curd Filling:
1 cup sugar
2/3 cup lemon juice
1 tablespoon lemon zest*
3 large eggs
2 egg yolks
6 tablespoons unsalted butter, cut into pieces

*I've completely forgotten the lemon zest once (oops) and the tart was still very lemony.

Preheat oven to 400 degrees.

For the crust, cream together butter and sugar in stand mixer until light and fluffy. Add flour, salt, cream and vanilla extract, mixing until dough is combined and crumbly.

Press dough into 10” tart pan (or four small tart pans), making sure dough is even across bottom and sides. Bake 15-20 minutes until firm and lightly browned. Allow to cool completely before adding filling.

For the filling, combine sugar and lemon juice in medium saucepan, stirring occasionally until brought to a boil.

In a large bowl, whisk eggs, egg yolks and zest together. Very slowly incorporate small amounts, a few tablespoons at a time, of the sugar mixture to the eggs, whisking continuously to avoid cooking the eggs.

Once fully incorporated, return mixture to pan and cook on medium heat until thickened (this will take around 8 minutes). Whisk frequently. When thickened, remove from heat and add butter, one piece at a time, mixing until melted. Allow to cool for 15 minutes before adding filling to crust.

Refrigerate tart 8 hours or overnight. Top with powdered sugar if you like.


After examining the recipe he told me, “Do you think you could use less butter in the filling next time? It doesn't taste lemony enough.” The guy is obsessed.

Thursday, May 10, 2012

Honey and Brown Butter Strawberry Banana Bread


Sometimes life is stressful. Sometimes you have exams you absolutely must excel in to get the fantastic grades you desire and three papers to write in the next two days. Sometimes you have who-knows-how-many loads of laundry spilling out of your closet. Sometimes you have bananas and strawberries getting older and older in your kitchen.

Luckily, for such moments as these there is strawberry banana bread.


As a kid I hated both strawberries and bananas with equal, intense passion. Now these berries (Did you know bananas are considered berries?? So are avocados and pumpkins. Wild!) rank among my absolute favorites and they work so so well in this recipe. The best part is probably the strawberries: the slices on top are cute and their juice seeps into the bread like a delicious natural glaze. :)


 Honey and Brown Butter Strawberry Banana Bread
Adapted from Joy the Baker Brown Butter Banana Strawberry Bread
makes 1 9x5” loaf or 9x13” cake

6 tablespoons unsalted butter, melted and browned
2 cups all-purpose flour
½ cup granulated sugar
¼ cup honey

1 teaspoon baking soda
½ teaspoon salt
¾ teaspoon cinnamon
2 large eggs
1 teaspoon pure vanilla extract
¼ cup strawberry yogurt or buttermilk
1 cup bananas, mashed (2-3 bananas)
½ cup diced strawberries + thin slices for top


Preheat oven to 350 degrees. Prepare 9x5” loaf or 9x13” cake pan with butter or cooking spray.

Heat butter in saucepan on stove until melted and golden brown. Butter is ready when light brown flakes begin to form at the bottom of the pan and butter smells nutty. The butter can burn quickly, so remove instantly to cool in a small bowl.

In medium bowl, whisk together flour, sugar, baking soda, salt and cinnamon. In separate large bowl or stand mixer, combine honey, eggs, vanilla, yogurt (or buttermilk) and mashed bananas. Add butter once cooled. Fold in dry ingredients until incorporated, scraping sides and bottom of the bowl. Fold in diced strawberries.

Pour into desired pan and top with sliced strawberries. Bake for 50 minutes to 1 hour or until a skewer inserted into the center comes out clean. Remove from oven and let cool in pan for 15 minutes before removing to continue cooling on a wire rack.

Wrap well and freeze bread or eat in the next four days.


Take that, finals.

Tuesday, May 1, 2012

Peanut Butter Banana Bundt Cake with Chocolate Glaze

Welcome!

After years of ardently following lovely baking blogs, I have decided to jump in for myself. What better way to do so than with a recipe adapted from one of my favorite bloggers, Joy the Baker?


Joy's was one of the first blogs I ever saw back in the Spring of 2010. Her witty writing and mouth-watering photos have kept me hooked ever since. When she came out with her first book in February 2012, I knew I had to pick it up. It is full of humor and wonderfully comforting recipes, including several delectable cakes. I combined Joy's skill with my favorite food, peanut butter, to bring you this:


This cake has a soft and smooth texture inside, a buttery and nutty crispness on the outside from the brown sugar and is full of the decadent triple threat of peanut butter, banana and chocolate.

Peanut butter-y, banana-y, chocolate-y goodness.

Peanut Butter Banana Bundt Cake with Chocolate Glaze
Adapted from Joy the Baker's Pumpkin Bundt Cake with Cinnamon Glaze

The Cake:
1 1/2 cups granulated sugar
1/2 cup brown sugar
2 cups all-purpose flour
2 teaspoons baking powder
2 teaspoons baking soda
1/4 teaspoon salt
1 cup oil
1/4 cup buttermilk*
1 teaspoon pure vanilla extract
1 1/2 cups bananas, mashed
3/4 cup creamy peanut butter
4 large eggs

The Glaze:
1 cup semi-sweet chocolate chips
3 tablespoons milk or cream

*Buttermilk can be made by adding 1 tablespoon of vinegar or lemon juice to a 1 cup measuring cup and filling the rest with milk to make 1 cup of buttermilk. To make 1/4 cup for this recipe, simply cut the measurements by 1/4 (1/4 tablespoon vinegar or lemon juice and milk to fill a 1/4 measuring cup).


Preheat oven to 350 degrees. Prepare bundt pan with butter (or cooking spray) and flour.


In large bowl, sift and whisk together granulated sugar, flour, baking powder, baking soda and salt. In separate bowl or stand mixer, blend together brown sugar, oil, buttermilk, vanilla extract, mashed bananas and peanut butter. When well mixed, add eggs one at a time, mixing thoroughly after each addition.

Add dry ingredients to wet and use rubber spatula to fold ingredients together. Scrape sides and bottom of bowl to fully incorporate dry ingredients (you don't want any pockets of flour in your finished cake!).

Pour mixture into prepared bundt pan. Tap pan on the counter to release any air trapped in the batter. Bake approximately 1 hour; when time gets close, test using a toothpick, which should come out clean. Allow cake to rest in pan for 30 minutes before removing. To remove, place plate or serving platter atop the bottom of bundt pan and flip so plate is on bottom. Say a prayer and gently lift pan off of cake.

When cake is completely cool, make the glaze. In a small saucepan, heat chocolate chips and milk or cream. Stir continuously, being careful to avoid burning by removing from heat when mixture just comes together.  The glaze will be thick, but spreadable. Pour liberally onto cake.

Slice. Serve. Smile.